The current v6.0.0-beta.7 metadata lists GeckoLib as a required project dependency, but it does not pin a specific GeckoLib file or version. Use the current release record instead of an older dependency checklist.
Project and version data checked against Modrinth on August 23, 2026.
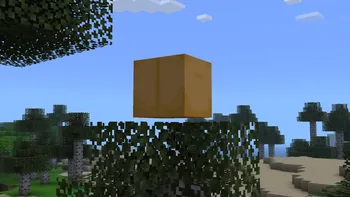
Official project media showing the box associated with Verity's arrival sequence.
Before you begin
Prepare one clean Forge 1.20.1 instance
Do not add Verity to a large existing modpack first. A clean instance makes missing dependencies, loader conflicts and AI setup errors easier to isolate. Keep a backup of any world you plan to use later.
The current v6.0.0-beta.7 metadata lists GeckoLib as a required project dependency, but it does not pin a specific GeckoLib file or version. Use the current release record instead of an older dependency checklist.
Game
Minecraft Java 1.20.1
Loader
Forge
Verity
v6.0.0-beta.7
Libraries
GeckoLib / YACL
AI paths
Groq or Ollama
Voice test
English
1. Download the matching Java release
Use Minecraft 1.20.1 with Forge for Verity JE v6.0.0-beta.7; the current release record lists no separate dependency files.
Download the current release JAR and keep its release notes with the file.
Keep the files as JARs. Do not extract them. Avoid third-party installers that promise to configure the mod automatically, particularly when they add an executable, browser extension or launcher unrelated to Minecraft.
Component
Required match
Purpose
Verity JE
v6.0.0-beta.7 / Forge 1.20.1
Main AI companion and horror mod
Separate dependency files
None listed in the current release metadata
Follow the maintained project instructions
Forge
Minecraft 1.20.1 profile
Loads the Java mods
2. Create the Forge profile and mods folder
Use the official Minecraft launcher, CurseForge or another launcher you already trust. The important point is that the instance reports Minecraft 1.20.1 and Forge before you copy any mod files.
1
Create a Minecraft 1.20.1 Forge instance
Give it a clear name such as Verity Test so it does not share files with unrelated packs.
2
Launch the instance once
This lets Forge create its folders and confirms the loader itself starts before Verity is added.
3
Open the instance folder
Use the launcher's Open Folder option and locate or create the mods directory inside that instance.
4
Copy the Verity JE JAR
Copy verity-6.0.0-beta.7.jar into the instance mods folder. Do not add an older dependency bundle unless the current project page explicitly lists it.
5
Launch and inspect the mod list
Confirm Verity JE is recognized before opening an important world.
3. Configure Groq or Ollama
Verity's conversation features require an AI path beyond the Forge installation. The maintainer currently links one tutorial for a fully online setup and another for a fully local Ollama setup. Follow the current tutorial rather than an old screenshot because configuration values and model choices can change.
For Groq, confirm the credential and network connection without exposing the credential in screenshots or public logs. For Ollama, install a supported local model, confirm the Ollama service is running and test it outside Minecraft if the mod cannot connect. Local models can require substantial disk space and memory, so slow responses are not always a Forge problem.
Choose one AI path first; do not troubleshoot Groq and Ollama simultaneously
Keep API credentials private and remove them before sharing logs
Test typed interaction before microphone input
For Ollama, confirm the local service and selected model are available
4. Test text, microphone and speech separately
Start with typed conversation. If typed responses work, the loader, dependencies and basic AI connection are probably functioning. Next, verify that Windows or your operating system allows Java or the launcher to use the microphone. Select the intended input device and check that it records outside Minecraft.
The project says speech-to-text and text-to-speech are tested only in English, even though AI chat supports broader language use. Test a short English phrase before diagnosing another language. If input works but spoken output does not, treat recognition and text-to-speech as separate checks.
5. Use a test world before your main save
Verity changes atmosphere and can introduce scripted events, extreme darkness and hostile encounters. A new test world lets you confirm spawning, animations, sound and AI behavior without risking a long-running save. Keep the original world backup outside the active saves directory.
Once the test is stable, copy the exact known-good mod set and configuration to the profile you plan to keep. When updating Verity, repeat the test rather than overwriting the only working setup.
Install Verity Mod Java and verify the first launch
Use one controlled test to confirm that you installed Verity Mod Java correctly.
Compare the release record with your installed Minecraft and Forge profile before launching.
To install Verity Mod Java correctly, let Forge reach the title screen and then open its Mods list. Confirm that Verity JE is visible before creating a world. If Forge reports a missing dependency, stop and compare the named requirement with the current project metadata instead of downloading a random bundle. If Minecraft closes, preserve the latest log and crash report because they identify loader, Java runtime and dependency failures more precisely than a screenshot of the launcher.
After you install Verity Mod Java and enter a disposable world, test the features in layers. First confirm the Verity object or spawn flow loads. Next test typed AI interaction through the configured Groq or Ollama path. Only then enable microphone input and spoken output. This order separates a Minecraft installation problem from an AI-service or audio-device problem.
A final successful test should be repeatable. Close Minecraft, restart the selected AI service if required and launch the same profile again. When the world, text interaction and selected voice features behave consistently, copy the exact profile configuration or back it up before adding unrelated mods. That record makes future Verity updates and compatibility checks much easier.
Java installation FAQ
Where do I put the Verity JE JAR?
Place it in the mods folder of the Minecraft 1.20.1 Forge instance you intend to launch.
Why does Forge say a dependency is missing?
GeckoLib is named as a required project dependency, but the metadata does not pin a file or version; follow the current release record.
Can I use Fabric for Verity JE?
The current Verity JE metadata lists Forge, not Fabric. Use a maintained Fabric release only if the project publishes one later.
Why does Verity load but not answer?
The game-side mod may be loaded while the Groq or Ollama connection is incomplete. Test the selected AI service and configuration.
Why can Verity not hear me?
Check typed chat first, then OS microphone permission, the selected input device and the project's English-only voice test coverage.
Installation sources
Use the current project pages for file versions and setup videos because installation requirements can change.